Sending your favorite creeps Halloween cards this season? Then you’re sure to get a few back, too!

This content originally appeared in the 2021 issue of Spooky Little Halloween—The Magazine. It contains affiliate links. See my disclaimer for more.
But what will you do with those cards when spooky season ends? Rather than ending up with a stack of cards that hangs around until February or packing them away in a box, make your Halloween cards into a quick and easy craft.
Each of the three ideas featured will take you less than 10 minutes to put together (I timed it!) but will give you a dose of Halloween all year long.

Halloween Card Notebook DIY
This DIY is great for larger cards. Repurpose them into a cover for a small notebook you can use around the house for things like to-do or shopping lists, collecting recipes, or capturing Halloween costume and decorating ideas. The best part? You can refill the pages when you use them all up!
What you’ll need:
- Halloween card (larger cards are great for this!)
- 8 – 12 sheets of blank paper (8.5 x 11 printer paper is perfect)
- Twine
- Ruler
- Pencil
- Scissors
- Optional: Halloween stickers, stamps, or washi tape
How to make it:
- Fold your blank paper in half, then insert it into your Halloween card. If the folded paper is larger than the card, line up the paper with an edge of the card and trace a line with your pencil to mark the excess. Then remove the paper from the card and trim it off. If you are using a larger quantity of blank paper, consider trimming it in batches (4 – 6 folded sheets, max) to ensure you are cutting straight lines.
- Measure 24 – 30 inches of twine (the striped cotton twine usually found at craft stores) with a ruler and cut. Insert trimmed blank paper into the card. Loop your twine around the center of the card and paper and tie it tightly without bending the card to secure the paper. (If you have one large enough, you may also choose to staple the blank paper to the fold of the card.) Tie the end of your twine into a bow and trim off any excess. Knot the ends to stop the twine from fraying over time.
- If you want to make your pages decorative, use Halloween stickers, stamps, or washi tape on your blank pages. A repeating pattern in the corner of every page is a great way to do this!

Halloween Card Matboard
Add a little something extra to your favorite Halloween photos by creating your own matboard. The hardest part of this DIY will likely be finding a photo!
What you’ll need:
- Halloween card with a geometric design you can cut away
- Exacto knife
- Scissors
- Cutting board
- Tape
- Ruler
- Photo from a Halloween activity
- Picture frame (4 x 6-inch or 5 x 7-inch frames should fit most cards)
How to make it:
- Open your card and place it face-up so you can see the front design.
- Using the Exacto knife, cut the card along the design you want to trim away. Go slow so you don’t rip the card. Once you remove the initial design, use your Exacto knife or a pair of scissors to trim any excess paper.
- Measure the opening and print a photo to size. Many drug stores in the U.S. offer photo sizing tools on their sites prior to ordering a print. You can also use free tools like Canva or PicMonkey to resize a photo.
- Line up your photo in the opening, then tape the photo in place on the inside of the card.
- Place the card inside a picture frame and find a place to display it! (Dollar or thrift stores are a great spot to buy affordable frames if you want to make several.)

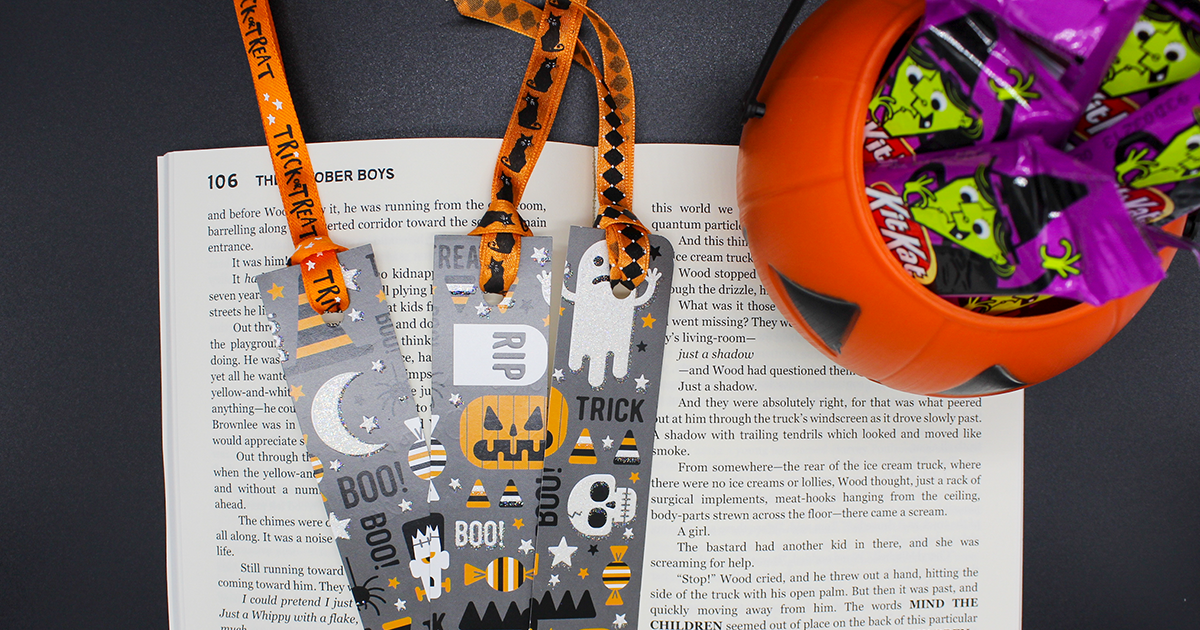
Halloween Card Bookmarks
Have a card with a cool pattern on the front? Turn it into a bookmark or two.
What you’ll need:
- Card with pattern
- Ruler
- Pencil
- Scissors
- Optional: Hole punch, ribbon
How to make it:
- On the inside of the card, measure at least one-inch strips and mark with a pencil. You can make these wider if you have a larger card or want a thicker bookmark.
- Cut the card in half along the fold, then cut each strip measured.
- If desired, punch a hole ¼ to ½-inch down from the top of the strip. Cut 6 – 8 inches of ribbon (Halloween, of course), then loop the ribbon through the hole to create a bookmark tassel.
- Insert in your favorite spooky book! (Need some suggestions? Find mine at bit.ly/31halloweenbooks.)
![]()
What DIY will you make with your Halloween cards?
There is no shortage of ideas around the Internet, but these were three of my faves for how quickly they come together. Share your favorite ideas in the comments.


